Swagger 文档的使用
JeremyJone ... 2025-3-15 大约 7 分钟
# Swagger 文档的使用
相信能看到这里,你一定对 swagger 多少有了解。它是极具推崇的文档生成工具,在多种语言下都可以有良好的体验。有兴趣的朋友可以去看看 官方文档。
# 安装
在 ASP.NET Core 中,直接安装 Swashbuckle.AspNetCore 即可。它包含了 SwaggerGen 以及 SwaggerUI。
通过命令:PM:Install-Package Swashbuckle.AspNetCore 或者在 包管理器 中安装。
# 基础实现
创建一个 Web Api 项目,然后在 Startup.cs 中稍微配置一下:
示例代码
具体代码可以看 示例代码
public void ConfigureServices(IServiceCollection services)
{
    services.AddSwaggerGen(c =>
    {
        c.SwaggerDoc("v1", new OpenApiInfo { Title = "WebApplication1", Version = "v1" });
    });
}

public void Configure(IApplicationBuilder app, IWebHostEnvironment env)
{
    if (env.IsDevelopment())
    {
        app.UseSwagger();
        app.UseSwaggerUI(c => c.SwaggerEndpoint("/swagger/v1/swagger.json", "WebApplication1 v1")); // 指定 json 端点,可省略
    }
}
1
2
3
4
5
6
7
8
9
10
11
12
13
14
15
16
2
3
4
5
6
7
8
9
10
11
12
13
14
15
16
接着,在 Controller 中的控制器类上面添加一个 [Route("[controller]")] 属性,并且在方法上添加 [HttpGet] 属性:
[Route("[controller]")]
public class WeatherForecastController : ControllerBase
{
    [HttpGet]
    public IEnumerable<WeatherForecast> Get()
    {
        // ...
    }
}
1
2
3
4
5
6
7
8
9
2
3
4
5
6
7
8
9
然后打开浏览器,在根路径后面加上 swagger 即可看到文档显示成功。
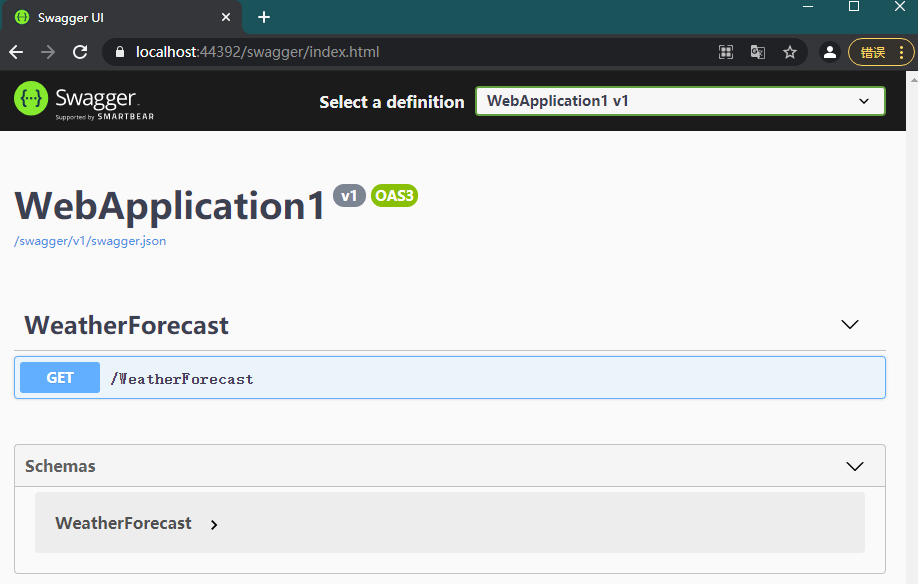
提示
在 .NET 5 中,创建一个 Web Api 项目之后,以上内容已经全部添加,还是很友好的。
# 配置路由
看到了成功的效果,现在来反推一下过程。
之所以文档会显示该接口,是因为我们配置了控制器的路由。如果我们删掉控制器中的配置,则在文档中就不会生成任何接口信息。
所有的控制器和方法都需要提供对应的路由和谓词属性。同时,路由不能重复,相同的方法可以有不同的谓词属性。
为了更好的测试,我们复制 Get 并起一个新的名字 MyFunc,同时给出 [HttpGet] 属性,它的路由默认为空。
[HttpGet]
public IEnumerable<WeatherForecast> MyFunc()
{
    // ...
}
1
2
3
4
5
2
3
4
5
执行程序,会看到报错:
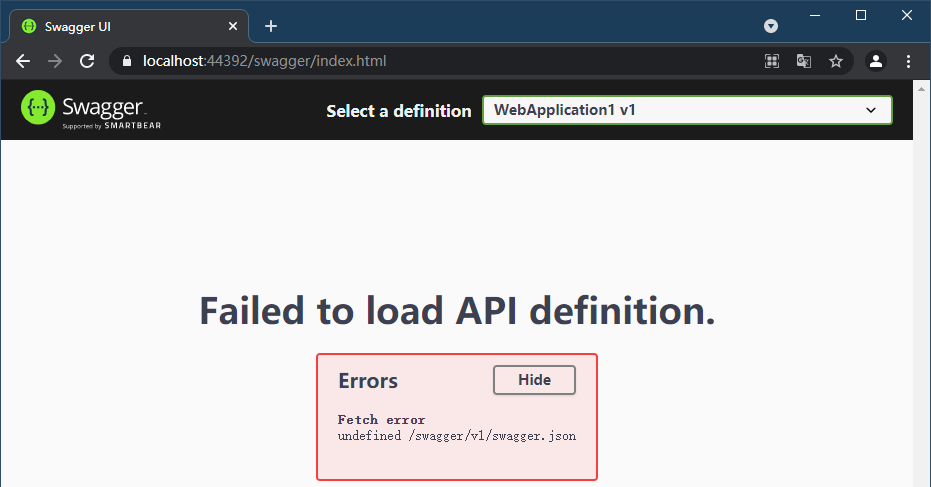
同时在输入栏中可以看到异常信息:
Swashbuckle.AspNetCore.SwaggerGen.SwaggerGeneratorException: Conflicting method/path combination "GET WeatherForecast" for actions - WebApplication1.Controllers.WeatherForecastController.Get (WebApplication1),WebApplication1.Controllers.WeatherForecastController.MyFunc (WebApplication1). Actions require a unique method/path combination for Swagger/OpenAPI 3.0. Use ConflictingActionsResolver as a workaround
1
很明显,方法冲突了。这就说明它在生成的时候将两个方法同时生成了路由为 <URL>/WeatherForecast/。该种情况的解决方法有两种,一种是单独写方法路由:
[HttpGet("index")]
public IEnumerable<WeatherForecast> Get()
{
    // ...
}

// or
[HttpGet]
[Route("index")]
public IEnumerable<WeatherForecast> Get()
{
    // ...
}
1
2
3
4
5
6
7
8
9
10
11
12
13
2
3
4
5
6
7
8
9
10
11
12
13
另外一种则是直接在控制器中写好方法路由:
[Route("[controller]/[action]")]
public class WeatherForecastController : ControllerBase
{
    [HttpGet]
    public IEnumerable<WeatherForecast> Get()
    {
        // ...
    }
}
1
2
3
4
5
6
7
8
9
2
3
4
5
6
7
8
9
后者在编写时会很方便,但是后期维护效果并不好,所以推荐相对灵活的单独编写方式。
推荐阅读
关于更多的路由内容,可以参考 官方文档 深入理解。
# 变更端点
默认情况下,swagger 文档的路由是 /swagger/{documentName}/swagger.json,如果需要替换,可以通过路由模板设置,需要注意,自定义的路由需要包含 {documentName} 参数:
public void Configure(IApplicationBuilder app, IWebHostEnvironment env)
{
    if (env.IsDevelopment())
    {
        app.UseSwagger(c =>
        {
            c.RouteTemplate = "api-docs/{documentName}/swagger.json";
        });

        // 修改了文档路由,需要同时更新 UI 的端点
        app.UseSwaggerUI(c => c.SwaggerEndpoint("/api-docs/v1/swagger.json", "WebApplication1 v1"));
    }
}
1
2
3
4
5
6
7
8
9
10
11
12
13
2
3
4
5
6
7
8
9
10
11
12
13
# 修改路由前缀
默认的路有前缀是 swagger,如果需要修改,可以通过修改 RoutePrefix 的方式:
app.UseSwaggerUI(c =>
{
    c.RoutePrefix = "swagger";
    c.SwaggerEndpoint("v1/swagger.json", "My API V1");
});
1
2
3
4
5
2
3
4
5
# 生成多文档
有时候需要将文档分类为多个文档,比如多个版本,这时只需要将上面的配置多配置几个即可。
第一步,在 Startup.cs 中配置好名称,比如 v2,该名称需要与路径和配置对应。
// Startup.cs
public void ConfigureServices(IServiceCollection services)
{
    services.AddSwaggerGen(c =>
    {
        c.SwaggerDoc("v1", new OpenApiInfo { Title = "WebApplication1", Version = "v1" });
        c.SwaggerDoc("v2", new OpenApiInfo { Title = "WebApplication1", Version = "v2" });
    });
}

public void Configure(IApplicationBuilder app, IWebHostEnvironment env)
{
    app.UseSwaggerUI(c =>
    {
        c.SwaggerEndpoint("/swagger/v1/swagger.json", "WebApplication1 v1");
        c.SwaggerEndpoint("/swagger/v2/swagger.json", "WebApplication1 v2");
    });
}
1
2
3
4
5
6
7
8
9
10
11
12
13
14
15
16
17
18
2
3
4
5
6
7
8
9
10
11
12
13
14
15
16
17
18
第二步,去控制器的方法中添加如下内容:
[HttpPost]
[ApiExplorerSettings(GroupName = "v2")]
public string Post([FromBody]Product product)
{
    // ...
}
1
2
3
4
5
6
2
3
4
5
6
此时就已经配置好了多文档:
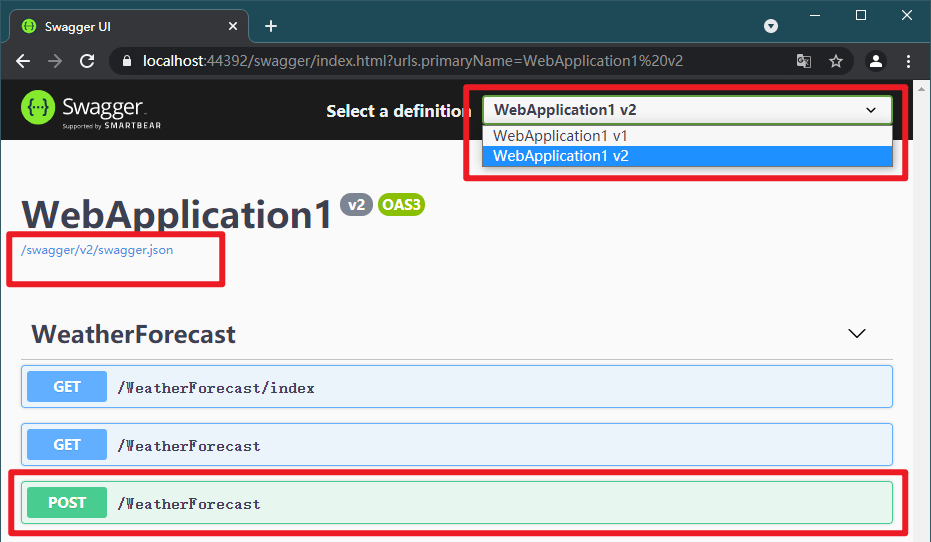
当然,多文档的名称是可以自定义的。所以,利用该方式可以将不同接口进行分类,形成分组式的多文档,这会带来更好的文档查阅体验。
# 配置文档内容
# 文档全局信息
可以通过配置自定义很多文档信息,比如:
// Startup.cs
services.AddSwaggerGen(c =>
{
    c.SwaggerDoc("v1", new OpenApiInfo
    {
        Title = "WebApplication1",
        Version = "v1",
        Description = "v1 document",
        Contact = new OpenApiContact
        {
            Name = "Jeremy Jone",
            Email = "jeremyjone@qq.com"
        },
        License = new OpenApiLicense
        {
            Name = "Apache 2.0",
            Url = new Uri("http://www.apache.org/licenses/LICENSE-2.0.html")
        }
    });
})
1
2
3
4
5
6
7
8
9
10
11
12
13
14
15
16
17
18
19
20
2
3
4
5
6
7
8
9
10
11
12
13
14
15
16
17
18
19
20
# 接口内容
对于接口,还可以通过属性的方式配置详细信息,比如响应类型:
[HttpGet]
//[ProducesResponseType(typeof(IEnumerable<WeatherForecast>), 201)]
[ProducesResponseType(201)]
[ProducesResponseType(typeof(IDictionary<string, string>), 400)]
[ProducesResponseType(500)]
public IEnumerable<WeatherForecast> MyFunc()
{
    // ...
}
1
2
3
4
5
6
7
8
9
2
3
4
5
6
7
8
9
如果返回类型只写了 IActionResult,则可以通过添加 typeof 为成功响应添加类型。(如上例行2)
# 使用 xml 文档
还可以通过 xml 给文档添加详细信息。具体方法是在每个控制器、方法、类和属性添加 xml 注释:
/// <summary>
/// 返回天气列表
/// </summary>
/// <remarks>Remarks!</remarks>
/// <response code="201">成功啦</response>
/// <response code="400">好像缺点什么</response>
/// <response code="500">服务器崩啦</response>
[HttpGet]
//[ProducesResponseType(typeof(IEnumerable<WeatherForecast>), 201)]
[ProducesResponseType(201)]
[ProducesResponseType(typeof(IDictionary<string, string>), 400)]
[ProducesResponseType(500)]
public IEnumerable<WeatherForecast> MyFunc()
{
    // ...
}
1
2
3
4
5
6
7
8
9
10
11
12
13
14
15
16
2
3
4
5
6
7
8
9
10
11
12
13
14
15
16
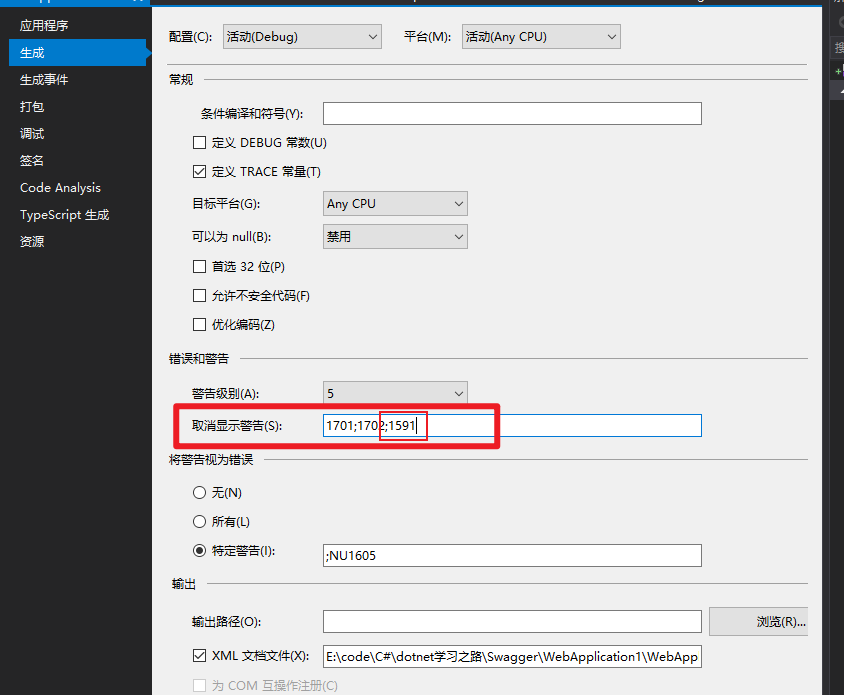
然后在项目属性中配置生成 xml 文档,
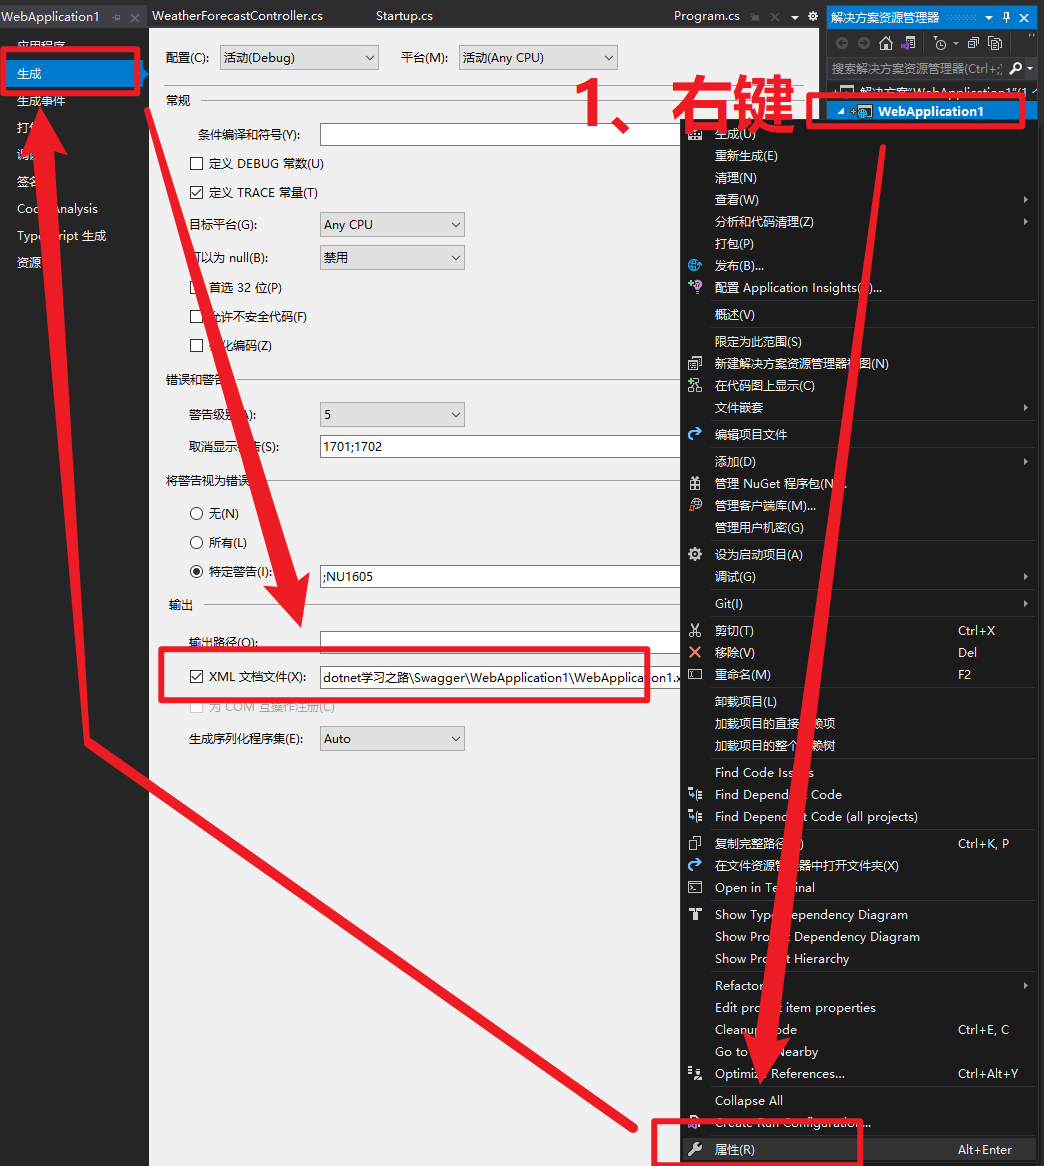
添加之后在配置中包含生成的 xml 文档,即可使用:
services.AddSwaggerGen(c =>
{
    var filePath = Path.Combine(System.AppContext.BaseDirectory, "WebApplication1.xml");
    c.IncludeXmlComments(filePath);
})
1
2
3
4
5
2
3
4
5
提示
如果包含多个 xml 文档,可以多次调用 IncludeXmlComments 方法添加,最终生成完整的文档。

但是这样会有一个问题,就是需要在每个类和方法前面都要添加注释,否则会有警告:
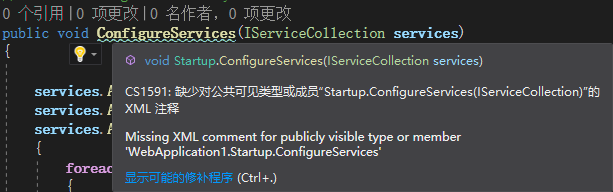
这样会很不爽,简单的配置一下,还是打开刚才配置生成 xml 文档的属性界面,添加 1591 到 取消显示警告 栏中即可:
# 配置认证
通常我们的接口都是需要认证和授权的,如果没有认证,是无法使用文档中的 Try it out 功能的。
最简单的就是写一个获取 token 接口,然后手动填写到认证对话框中,就可以开始使用了。
但是这种方式并不好,我们可以利用认证服务器进行稍微复杂一点的认证。好在 Swagger 为我们提供了便利的认证功能,通过简单设置即可进行认证:
官方文档给的 implicit 示例:
// Startup.cs
services.AddSwaggerGen(c =>
{
    // Define the OAuth2.0 scheme that's in use (i.e. Implicit Flow)
    c.AddSecurityDefinition("oauth2", new OpenApiSecurityScheme
    {
        Type = SecuritySchemeType.OAuth2,
        Flows = new OpenApiOAuthFlows
        {
            Implicit = new OpenApiOAuthFlow
            {
                AuthorizationUrl = new Uri("/auth-server/connect/authorize", UriKind.Relative),
                Scopes = new Dictionary<string, string>
                {
                    { "readAccess", "Access read operations" },
                    { "writeAccess", "Access write operations" }
                }
            }
        }
    });
};
1
2
3
4
5
6
7
8
9
10
11
12
13
14
15
16
17
18
19
20
21
2
3
4
5
6
7
8
9
10
11
12
13
14
15
16
17
18
19
20
21
自己写的 code 示例:
services.AddSwaggerGen(c =>
{
    c.AddSecurityDefinition("oauth2", new OpenApiSecurityScheme
    {
        Type = SecuritySchemeType.OAuth2,
        Flows = new OpenApiOAuthFlows
        {
            AuthorizationCode = new OpenApiOAuthFlow
            {
                AuthorizationUrl = new Uri("auth-server/connect/authorize"),
                TokenUrl = new Uri("auth-server/connect/token"),
                Scopes = new Dictionary<string, string> {
                    { "OidcApiName", "ApiName" }
                }
            }
        }
    });
};

app.UseSwaggerUI(c =>
{
    c.SwaggerEndpoint("/swagger/v1/swagger.json", "ApiName");

    c.OAuthClientId("OidcSwaggerUIClientId");
    c.OAuthAppName("ApiName");
    c.OAuthUsePkce();
});
1
2
3
4
5
6
7
8
9
10
11
12
13
14
15
16
17
18
19
20
21
22
23
24
25
26
27
2
3
4
5
6
7
8
9
10
11
12
13
14
15
16
17
18
19
20
21
22
23
24
25
26
27
请注意
所有配置需要配合认证服务器的客户端配置项。
提示
不了解认证的客户端,请参考 认证与授权 。
然后我们就可以进行简单的认证并开始使用了。
# 更多
Swagger 还有更多的内容,平时基本用不到或者很少用到,比如高级过滤器、重定义 css 样式等。如果以上内容不能满足你的需求或者你想了解更多,可以参考 官方文档 进一步学习。